I've seen ornament wreaths all over Pinterest for a couple of years now, but it wasn't until this year that I decided that I HAD to make one for myself. I searched through so many tutorials looking for just the right one. I finally stumbled across one that mentioned buying ornaments from the Dollar Tree because they were super cheap (Which is my favorite way to DIY!). I ended up making this wreath for under $30! Keep reading to see how you can make one of these for yourself!
Items Needed:
- Shatterproof ornaments (Just in case your wreath falls) - I ended up using about 136. I got them all from the Dollar Tree and I used 56 large ornaments (8 packs of 7), 35 medium ornaments (bought 4 packs of 12, had 13 left over and I'll show you what I did with the extras), and 45 small ornaments (3 packs of 15). They were all $1 per pack!
- Foam/wire wreath form - You can use any size depending on where you want to put your finished wreath. I used a 14" foam wreath ($4 at Wal-Mart) because I wanted mine to be pretty big since it was going to be the only decoration on my front door.
- Hot glue gun and glue sticks
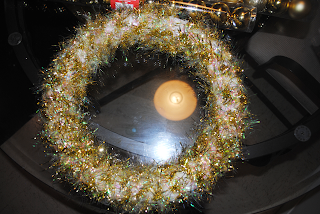
- Optional: garland to cover your wreath form - I used 2 pieces of 9ft tinsel garland from the Dollar Tree (spray paint can also be used or if you don't care about the wreath showing through then don't bother), burlap ribbon to make a bow (you can also buy these pre-made)
Let's get started!
- Take your garland and hot glue one end to your wreath form. Wrap it all the way around until your entire wreath is covered. Use another dollop of glue to hold down the end of the garland. I used both lengths of garland I purchased and I was so lucky I bought two because the first one barely covered half!
2. Take your ornaments and take off the loop at the top (pictured below). They should pop off pretty easily, but if they don't just use a pair of pliers. This step is completely optional and I haven't seen too many tutorials that say to do this. I took them off to make Step 3 much easier.
3. Lay your wreath flat on the table and start to glue your largest ornaments to the outside ring. I pushed the top of the ornament into the styrofoam to create a small hole. Then I added glue to the top of the ornament and pushed it back into the hole. I felt like it made the ornaments stick better especially with the cheaper garland I used to wrap the wreath. For even more stability I glued the ornaments to each other. I also chose to alternate between the 3 different styles of ornaments I had. When you're finished, the wreath should look like the second picture below.


4. Next, start on the inner ring following the same steps as before. There will be a gap, but I used that as a place to put my burlap ribbon to hang my wreath.
I don't have any pictures for the next 3 steps :( I was so excited about how my wreath was turning out that I forgot to take pictures! I used an ornament wreath tutorial from The Homeless Finch so you can also follow along there.
5. I used the leftover larger ornaments and started to attach them to the space between the inner and outer ring. I tried to mix up the colors that were next to each other, but in the end I just started to put them where I had the most space until I ran out.
6. Next I started to work with the medium sized ornaments and used them to fill any larger gaps I had left over from using the bigger ornaments. After I ran out of those I moved onto the smallest size of ornament I had to fill in any additional gaps. I know what to do with the extra ornaments I had so I piled on a few more until I was satisfied.
7. I made a simple bow using this burlap bow tutorial I found on Pinterest and glued it to the top of the burlap loop used to hang my wreath. I glued 3 leftover ornaments to the middle of the bow and I was all done!
Tips & Tricks:
- Don't use too much glue. I used wayyyyyyyy to much and it really shows up close.
- Buy ornaments based on where you plan on putting your wreath. If it's going on an exposed front door, don't buy expensive vintage ornaments.
- You can use extra garland (or tinsel) to fill in any unwanted gaps between your ornaments.
- Go crazy with color! I stuck to a gold, monochromatic look for my wreath because it was easier to buy ornaments and matching ribbon, etc. I've seen some awesome wreaths in all colors.
- Don't throw away any ornaments you have left over. I used mine to decorate the garland along my staircase! They could also be used to make a smaller wreath or placed in a vase for another DIY holiday decoration.
These would make great DIY gifts for friends and family members. I think it would be great to add a large wooden letter for a newlywed couple and gift it as a housewarming present for their first home! I would love to make a smaller one for my downstairs window as well. What holiday-themed DIYs have you been dying to make? Let me know in the comments below!


